The EFI Development Kit (EDK) contains the public part of the original reference EFI implementation developed by Intel. It includes source code, makefiles and binaries for the reference EFI Shell. Build tips (targets) include a Win32 (NT32) UEFI emulator and DUET (Developer’s UEFI Emulation) which create an emulated environment where you can test EFI applications and code without the need for an actual EFI-enabled Platform.
One of the major problems with the EDK is that the build environment is very much Microsoft Windows centric. This reflects the heritage of the EDK. EFI was initially developed for the IA64 (Merced/Itanium) platform and the EDK, running on 32-bit Windows NT X86, was used by engineers in a number of companies to develop the firmware utilities and boot managers for their initial Itanium offerings. I was one of those people who used the EDK back in the early 2000s.
In order to build the EDK out of the box, you need specific versions of Microsoft Visual Studio (VS2003 or VS2005) and a specific version of the Microsoft Assembler (MASM 6.15). I have built both 32-bit and 64-bit versions of DUET using Visual Studio 2010 by modifying some of the build scripts but there is no easy replacement for MASM 6.15. If you do not already have a copy, or cannot obtain a copy, you cannot build the EDK. The assembler included with Visual Studio is not sufficient.
Officially the EDK11 is the response to the UEFI community’s request for a better build and version tracking environment for UEFI and PI (Platform Initialization) development. From a developer’s perspective, the main difference between EDK and EDK11 is the enhanced build environment. Gone are the dependencies on Visual Studio and MASM. In its place is a much more logical partitioning of the source code into what is termed packages and a much more flexible build system. The end result is that the EDK11 build system is much easier to port to new platforms.
For a number of years the EDK was hosted by TianoCore on their own website. However in the last year the project was opened up and moved to SourceForge in the form of a main project and a number of subprojects. In November 2010 a snapshot of the EDK11 called UEFI Development Kit 2010 was released which contained a Unix package.
I recently decided to see what it would take to build and run the UEFI emulator in the EDK11 on 64-bit Fedora 14. It turns out that it was surprisingly easy provided that you disabled the networking components in the Unix package. It looks like the Unix package was developed under Mac OS X or possibly one of the BSDs and then ported to Mac OS X as the networking components currently have a dependency on the Berkeley Packet Filter (BFP) in one critical file (UnixSnp.c). Unfortunately BSP is not supported on GNU/Linux. The equivalent functionality is provided by the Linux Socket Filter but it is not just a simple plug-in replacement for BPF as the API model is significantly different.
So how do you build the EDK11 on Fedora 14? I am going to assume that you have a full 64-bit development environment already set up. First of all, download a recent snapshot of the EDK11 and install it in any directory you like. Then, from within that directory, do the following.
Edit ../Conf/tools_def.txt to add -fPIC to the GCC compiler options flag ELFGCC_X64_CC_FLAGS as shown below:
##################
# X64 definitions
##################
*_ELFGCC_X64_CC_PATH               = DEF(ELFGCC_BIN)/gcc
*_ELFGCC_X64_ASLCC_PATH            = DEF(ELFGCC_BIN)/gcc
*_ELFGCC_X64_SLINK_PATH            = DEF(ELFGCC_BIN)/ar
*_ELFGCC_X64_DLINK_PATH            = DEF(ELFGCC_BIN)/ld
*_ELFGCC_X64_ASLDLINK_PATH         = DEF(ELFGCC_BIN)/ld
*_ELFGCC_X64_ASM_PATH              = DEF(ELFGCC_BIN)/gcc
*_ELFGCC_X64_PP_PATH               = DEF(ELFGCC_BIN)/gcc
*_ELFGCC_X64_ASLPP_PATH            = DEF(ELFGCC_BIN)/gcc
*_ELFGCC_X64_VFRPP_PATH            = DEF(ELFGCC_BIN)/gcc
*_ELFGCC_X64_RC_PATH               = DEF(ELFGCC_BIN)/objcopy

# add -fPIC
*_ELFGCC_X64_CC_FLAGS              = -fPIC -Os -fshort-wchar -fno-strict-aliasing -Wall -Werror -Wno-missing-braces -Wno-address -Wno-array-bounds -c -include AutoGen.h -D_EFI_P64
*_ELFGCC_X64_DLINK_FLAGS           = -nostdlib --shared --entry $(IMAGE_ENTRY_POINT) -u $(IMAGE_ENTRY_POINT)
*_ELFGCC_X64_SLINK_FLAGS           =
*_ELFGCC_X64_ASM_FLAGS             = -gen-debug -c -x assembler -imacros $(DEST_DIR_DEBUG)/AutoGen.h
*_ELFGCC_X64_PP_FLAGS              = -E -x assembler-with-cpp -include $(DEST_DIR_DEBUG)/AutoGen.h
*_ELFGCC_X64_VFRPP_FLAGS           = -x c -E -P -DVFRCOMPILE --include $(DEST_DIR_DEBUG)/$(MODULE_NAME)StrDefs.h
*_ELFGCC_X64_RC_FLAGS              = DEF(GCC_X64_RC_FLAGS)
Edit ../UnixPkg/UnixPkgX64.dsc and comment out all the networking drivers as shown below:
  #
  # Network stack drivers
  #
#  UnixPkg/UnixSnpDxe/UnixSnpDxe.inf
#  MdeModulePkg/Universal/Network/DpcDxe/DpcDxe.inf
#  MdeModulePkg/Universal/Network/ArpDxe/ArpDxe.inf
#  MdeModulePkg/Universal/Network/Dhcp4Dxe/Dhcp4Dxe.inf
#  MdeModulePkg/Universal/Network/Ip4ConfigDxe/Ip4ConfigDxe.inf
#  MdeModulePkg/Universal/Network/Ip4Dxe/Ip4Dxe.inf
#  MdeModulePkg/Universal/Network/MnpDxe/MnpDxe.inf
#  MdeModulePkg/Universal/Network/VlanConfigDxe/VlanConfigDxe.inf
#  MdeModulePkg/Universal/Network/Mtftp4Dxe/Mtftp4Dxe.inf
#  MdeModulePkg/Universal/Network/Tcp4Dxe/Tcp4Dxe.inf
#  MdeModulePkg/Universal/Network/Udp4Dxe/Udp4Dxe.inf

  MdeModulePkg/Universal/SmbiosDxe/SmbiosDxe.inf
  MdeModulePkg/Universal/HiiDatabaseDxe/HiiDatabaseDxe.inf
  MdeModulePkg/Universal/SetupBrowserDxe/SetupBrowserDxe.inf
  MdeModulePkg/Universal/PrintDxe/PrintDxe.inf
  MdeModulePkg/Universal/DriverSampleDxe/DriverSampleDxe.inf {
    <LibraryClasses>
      PcdLib|MdePkg/Library/BasePcdLibNull/BasePcdLibNull.inf
  }

  #FatPkg/EnhancedFatDxe/Fat.inf
  FatBinPkg/EnhancedFatDxe/Fat.inf
!endif
There is an simple typo with EnhancedFatDxe directive. Replace that directive with the correct directive as shown above.
The network drivers in ../UnixPkg/UnixPkgX64.fdf also need to be commented out:
#
# Network stack drivers
#
#INF  UnixPkg/UnixSnpDxe/UnixSnpDxe.inf
#INF  MdeModulePkg/Universal/Network/DpcDxe/DpcDxe.inf
#INF  MdeModulePkg/Universal/Network/ArpDxe/ArpDxe.inf
#INF  MdeModulePkg/Universal/Network/Dhcp4Dxe/Dhcp4Dxe.inf
#INF  MdeModulePkg/Universal/Network/Ip4ConfigDxe/Ip4ConfigDxe.inf
#INF  MdeModulePkg/Universal/Network/Ip4Dxe/Ip4Dxe.inf
#INF  MdeModulePkg/Universal/Network/MnpDxe/MnpDxe.inf
#INF  MdeModulePkg/Universal/Network/VlanConfigDxe/VlanConfigDxe.inf
#INF  MdeModulePkg/Universal/Network/Mtftp4Dxe/Mtftp4Dxe.inf
#INF  MdeModulePkg/Universal/Network/Tcp4Dxe/Tcp4Dxe.inf
#INF  MdeModulePkg/Universal/Network/Udp4Dxe/Udp4Dxe.inf
By the way, the extension .fdf denotes a EDK11 Flash Description File.
You are now ready to start an actual build. Change directory to the top directory of the EDK11 sources and do the following:
$ WORKSPACE=`pwd`; export WORKSPACE
$ . ./edksetup.sh
WORKSPACE: /opt/edk2
EDK_TOOLS_PATH: /opt/edk2/BaseTools
Copying $EDK_TOOLS_PATH/Conf/build_rule.template
     to $WORKSPACE/Conf/build_rule.txt
Copying $EDK_TOOLS_PATH/Conf/FrameworkDatabase.template
     to $WORKSPACE/Conf/FrameworkDatabase.txt
Copying $EDK_TOOLS_PATH/Conf/tools_def.template
     to $WORKSPACE/Conf/tools_def.txt
Copying $EDK_TOOLS_PATH/Conf/target.template
     to $WORKSPACE/Conf/target.txt
$
$ cd UnixPkg
$ ./build64.sh
If all goes well, you should see something like the following:
$ ./build64.sh
Building from: /work/UDK1/edk2
using prebuilt tools
/work/UDK1/edk2/BaseTools/BinWrappers/Linux-x86_64:/usr/lib64/qt-3.3/bin:/usr/lib64/ccache:/usr/local/bin:/usr/bin:/bin:/usr/local/sbin:/usr/sbin:/sbin:/home/fpm/bin
/work/UDK1/edk2/BaseTools/BinWrappers/Linux-x86_64/build
Build environment: Linux-2.6.35.10-74.fc14.x86_64-x86_64-with-fedora-5
Build start time: 23:24:14, Jan.20 2011

WORKSPACE                = /work/UDK1/edk2
ECP_SOURCE               = /work/UDK1/edk2/EdkCompatibilityPkg
EDK_SOURCE               = /work/UDK1/edk2/EdkCompatibilityPkg
EFI_SOURCE               = /work/UDK1/edk2/EdkCompatibilityPkg
EDK_TOOLS_PATH           = /work/UDK1/edk2/BaseTools

TARGET_ARCH              = X64
TARGET                   = DEBUG
TOOL_CHAIN_TAG           = ELFGCC

Active Platform          = /work/UDK1/edk2/UnixPkg/UnixPkgX64.dsc
Flash Image Definition   = /work/UDK1/edk2/UnixPkg/UnixPkgX64.fdf

Processing meta-data . done!
Generating code . done!
Generating makefile . done!
make[1]: Entering directory `/work/UDK1/edk2/Build/UnixX64/DEBUG_ELFGCC/X64'
Building ... /work/UDK1/edk2/UnixPkg/UnixPkgX64.dsc [X64]

......
......
GenFds -f /work/UDK1/edk2/UnixPkg/UnixPkgX64.fdf -o /work/UDK1/edk2/Build/UnixX64/DEBUG_GCC44 -t GCC44 -b DEBUG -p /work/UDK1/edk2/UnixPkg/UnixPkgX64.dsc -a X64  -D "EFI_SOURCE=/work/UDK1/edk2/EdkCompatibilityPkg"  -D "EDK_SOURCE=/work/UDK1/edk2/EdkCompatibilityPkg"  -D "PLATFORM_VERSION=0.3"  -D "TARGET=DEBUG"  -D "PLATFORM_GUID=7b3c1fb4-8986-11db-b5b2-0040d02b1835"  -D "SUPPORTED_ARCHITECTURES=X64"  -D "SKUID_IDENTIFIER=DEFAULT"  -D "DSC_ SPECIFICATION=0x00010005"  -D "BUILD_TARGETS=DEBUG|RELEASE"  -D "OUTPUT_DIRECTORY=Build/UnixX64"  -D "PLATFORM_NAME=Unix"  -D "FLASH_DEFINITION=UnixPkg/UnixPkgX64.fdf"
Fd File Name:FV_RECOVERY

Generate Region at Offset 0x0
   Region Size = 0x580000
   Region Name = FV

Generating FVRECOVERY FV
########################################
########################################
########################################
########################################
########################################
########################################
##################
Generate Region at Offset 0x580000
   Region Size = 0xC000
   Region Name = DATA

Generate Region at Offset 0x58C000
   Region Size = 0x2000
   Region Name = None

Generate Region at Offset 0x58E000
   Region Size = 0x2000
   Region Name = DATA

Generate Region at Offset 0x590000
   Region Size = 0x10000
   Region Name = None

Generate Region at Offset 0x0
   Region Size = 0x580000
   Region Name = FV

Generate Region at Offset 0x580000
   Region Size = 0xC000
   Region Name = DATA

Generate Region at Offset 0x58C000
   Region Size = 0x2000
   Region Name = None

Generate Region at Offset 0x58E000
   Region Size = 0x2000
   Region Name = DATA

Generate Region at Offset 0x590000
   Region Size = 0x10000
   Region Name = None

GUID cross reference file can be found at /work/UDK1/edk2/Build/UnixX64/DEBUG_GCC44/FV/Guid.xref

FV Space Information
FVRECOVERY [47%Full] 5767168 total, 2756088 used, 3011080 free

- Done -
Build end time: 23:25:21, Jan.20 2011
Build total time: 00:07

$
You can customize a certain number of things in the emulator by modifying the contents of the PCD entries in ../UnixPkg/UnixPkgX64.dsc. Here are the default entries:
################################################################################
#
# Pcd Dynamic Section - list of all EDK II PCD Entries defined by this Platform
#
################################################################################

[PcdsDynamicDefault.common.DEFAULT]
  gEfiMdeModulePkgTokenSpaceGuid.PcdFlashNvStorageFtwSpareBase64|0
  gEfiMdeModulePkgTokenSpaceGuid.PcdFlashNvStorageFtwWorkingBase64|0
  gEfiMdeModulePkgTokenSpaceGuid.PcdFlashNvStorageVariableBase64|0
  gEfiUnixPkgTokenSpaceGuid.PcdUnixConsole|L"Bus Driver Console Window"
  gEfiUnixPkgTokenSpaceGuid.PcdUnixUga|L"UGA Window"
  gEfiUnixPkgTokenSpaceGuid.PcdUnixFileSystem|L".!../../../../EdkShellBinPkg/Bin/Ia32/Apps"
  gEfiUnixPkgTokenSpaceGuid.PcdUnixVirtualDisk|L"disk1.img:FW"
  gEfiUnixPkgTokenSpaceGuid.PcdUnixPhysicalDisk|L"E:RW;245760;512"
  gEfiUnixPkgTokenSpaceGuid.PcdUnixCpuModel|L"Intel(R) Processor Model"
  gEfiUnixPkgTokenSpaceGuid.PcdUnixCpuSpeed|L"3000"
  gEfiUnixPkgTokenSpaceGuid.PcdUnixMemorySize|L"128!128"
  gEfiUnixPkgTokenSpaceGuid.PcdUnixSerialPort|L"/dev/ttyS0!/dev/ttyS1"
  gEfiUnixPkgTokenSpaceGuid.PcdUnixNetworkInterface|L"em"

[PcdsDynamicHii.common.DEFAULT]
  gEfiMdeModulePkgTokenSpaceGuid.PcdConOutColumn|L"Setup"|gEfiUnixSystemConfigGuid|0x0|80
  gEfiMdeModulePkgTokenSpaceGuid.PcdConOutRow|L"Setup"|gEfiUnixSystemConfigGuid|0x4|25
  gEfiIntelFrameworkModulePkgTokenSpaceGuid.PcdPlatformBootTimeOut|L"Timeout"|gEfiGlobalVariableGuid|0x0|10
and here is my customized PCD Dynamic Section entries:
[PcdsDynamicDefault.common.DEFAULT]
  gEfiMdeModulePkgTokenSpaceGuid.PcdFlashNvStorageFtwSpareBase64|0
  gEfiMdeModulePkgTokenSpaceGuid.PcdFlashNvStorageFtwWorkingBase64|0
  gEfiMdeModulePkgTokenSpaceGuid.PcdFlashNvStorageVariableBase64|0
  gEfiUnixPkgTokenSpaceGuid.PcdUnixGop|L"UEFI Emulator"
  gEfiUnixPkgTokenSpaceGuid.PcdUnixFileSystem|L"/boot/efi/"
  gEfiUnixPkgTokenSpaceGuid.PcdUnixCpuModel|L"My Processor Model"
  gEfiUnixPkgTokenSpaceGuid.PcdUnixCpuSpeed|L"3000"
  gEfiUnixPkgTokenSpaceGuid.PcdUnixMemorySize|L"128!128"
  gEfiUnixPkgTokenSpaceGuid.PcdUnixSerialPort|L"/dev/tty1"
  gEfiUnixPkgTokenSpaceGuid.PcdUnixNetworkInterface|L"eth0"

[PcdsDynamicHii.common.DEFAULT]
  gEfiMdeModulePkgTokenSpaceGuid.PcdConOutColumn|L"Setup"|gEfiUnixSystemConfigGuid|0x0|80
  gEfiMdeModulePkgTokenSpaceGuid.PcdConOutRow|L"Setup"|gEfiUnixSystemConfigGuid|0x4|25
  gEfiIntelFrameworkModulePkgTokenSpaceGuid.PcdPlatformBootTimeOut|L"Timeout"|gEfiGlobalVariableGuid|0x0|10
Here the name of the GOP X11 Window is changed to UEFI Emulator, one serial port /dev/tty1 is defined, an eth0 network device is specified, and the emulator is told to mount /boot/efi/ which on this system is an actual EFI System Partition (ESP) and thus can be read and written to by the emulator.
If you wish to experiment with other device and filesystem options, the following extract from UnixBusdriver.c should help you understand the PCD Dynamic Section entries.
This following section documents the environment variables for the UNIX build. These variables are used to define the (virtual) hardware configuration of the UNIX environment A ! can be used to separate multiple instances in a variable. Each instance represents a separate hardware device. EFI_UNIX_PHYSICAL_DISKS - maps to drives on your system EFI_UNIX_VIRTUAL_DISKS - maps to a device emulated by a file EFI_UNIX_FILE_SYSTEM - mouts a directory as a file systemixed - Fixed disk like a hard drive. emovable - Removable media like a floppy or CD-ROM. Read nly - Write protected device. Read rite - Read write device. - Decimal number of blocks a device supports. - Decimal number of bytes per block. UNIX environment variable contents. '<' and '>' are not part of the variable, they are just used to make this help more readable. There should be no spaces between the ';'. Extra spaces will break the variable. A '!' is used to separate multiple devices in a variable. EFI_UNIX_VIRTUAL_DISKS = ; ; [!...] EFI_UNIX_PHYSICAL_DISKS = : ; ; [!...] Virtual Disks: These devices use a file to emulate a hard disk or removable media device. Thus a 20 MB emulated hard drive would look like: EFI_UNIX_VIRTUAL_DISKS=FW;40960;512 A 1.44MB emulated floppy with a block size of 1024 would look like: EFI_UNIX_VIRTUAL_DISKS=RW;1440;1024 Physical Disks: These devices use UNIX to open a real device in your system Thus a 120 MB floppy would look like: EFI_UNIX_PHYSICAL_DISKS=B:RW;245760;512 Thus a standard CD-ROM floppy would look like: EFI_UNIX_PHYSICAL_DISKS=Z:RO;307200;2048 EFI_UNIX_FILE_SYSTEM = [!...] Mounting the two directories C:\FOO and C:\BAR would look like: EFI_UNIX_FILE_SYSTEM=c:\foo!c:\bar
Ignore the DOS drive type conventions. They are a legacy from the original roots of the EFI Development Kit. Documentation is one of those areas where both the EDK and EDK11 source code frankly falls flat on its face. It is abysmal and very often incorrect.
To invoke the emulator, cd to the the location of the emulator binary and enter ./SecMain. If you do not know the location, check the output from the build script. The location of SecMain is outputted by the build script just prior to completion. See above for an example of the build script output.
Why SecMain I hear you ask? Well, it turns out that UEFI by itself does not initialize platform hardware. Before UEFI executes after a cold boot, the platform goes through what is called the Platform Initialization stage. PI consists of, in order of invocation, a Security stage which includes initial booting and image integrity checking, a Pre-EFI Initialization (PEI) stage where memory and other chipsets are initialized and a Driver Execution Environment (DXE) stage which loads additional drivers. Only then is UEFI invoked. From this brief description of PI you should understand that SecMain refers to the Security stage.
$ ./SecMain

EDK SEC Main UNIX Emulation Environment from edk2.sourceforge.net
  BootMode 0x01
  SEC passing in 128 KB of temp RAM at 0x40000000 to PEI
  FD loaded from ../FV/FV_RECOVERY.fd at 0x41000000 contains SEC Core

PROGRESS CODE: V3040003 I0
Loading driver F348F6FE-8985-11DB-B4C3-0040D02B1835
InstallProtocolInterface: 5B1B31A1-9562-11D2-8E3F-00A0C969723B 46E91A40
Loading driver at 0x00046D89000 EntryPoint=0x00046D892AF Metronome.efi
InstallProtocolInterface: BC62157E-3E33-4FEC-9920-2D3B36D750DF 46E65F18
PROGRESS CODE: V3040002 I0
*******************file 1188606448 line 131
InstallProtocolInterface: 26BACCB2-6F42-11D4-BCE7-0080C73C8881 46D8B1B0
PROGRESS CODE: V3040003 I0
........
With the default build, you cannot use a full pathname to invoke SecMain because of the relative path to FV_RECOVERY.fd which is the file containing the emulated flash device image.
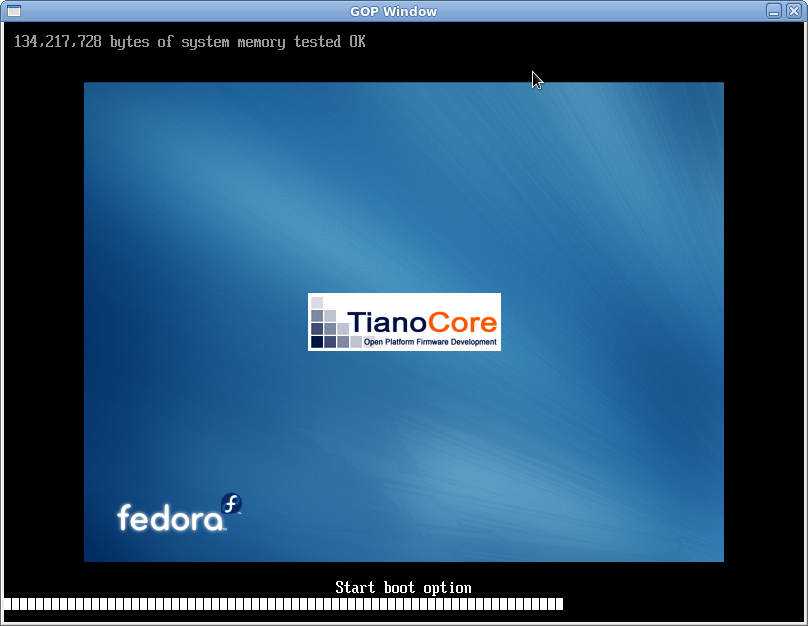
If all goes well you should see something like the following screen. The combined Fedora/TianoCore splash screen is something I came up as an experiment. You should just see a small TianoCore splash screen on a black background.
If you press any key while the progress bar is displayed (default time is 10 seconds), you will end up in the boot manager application as shown here:
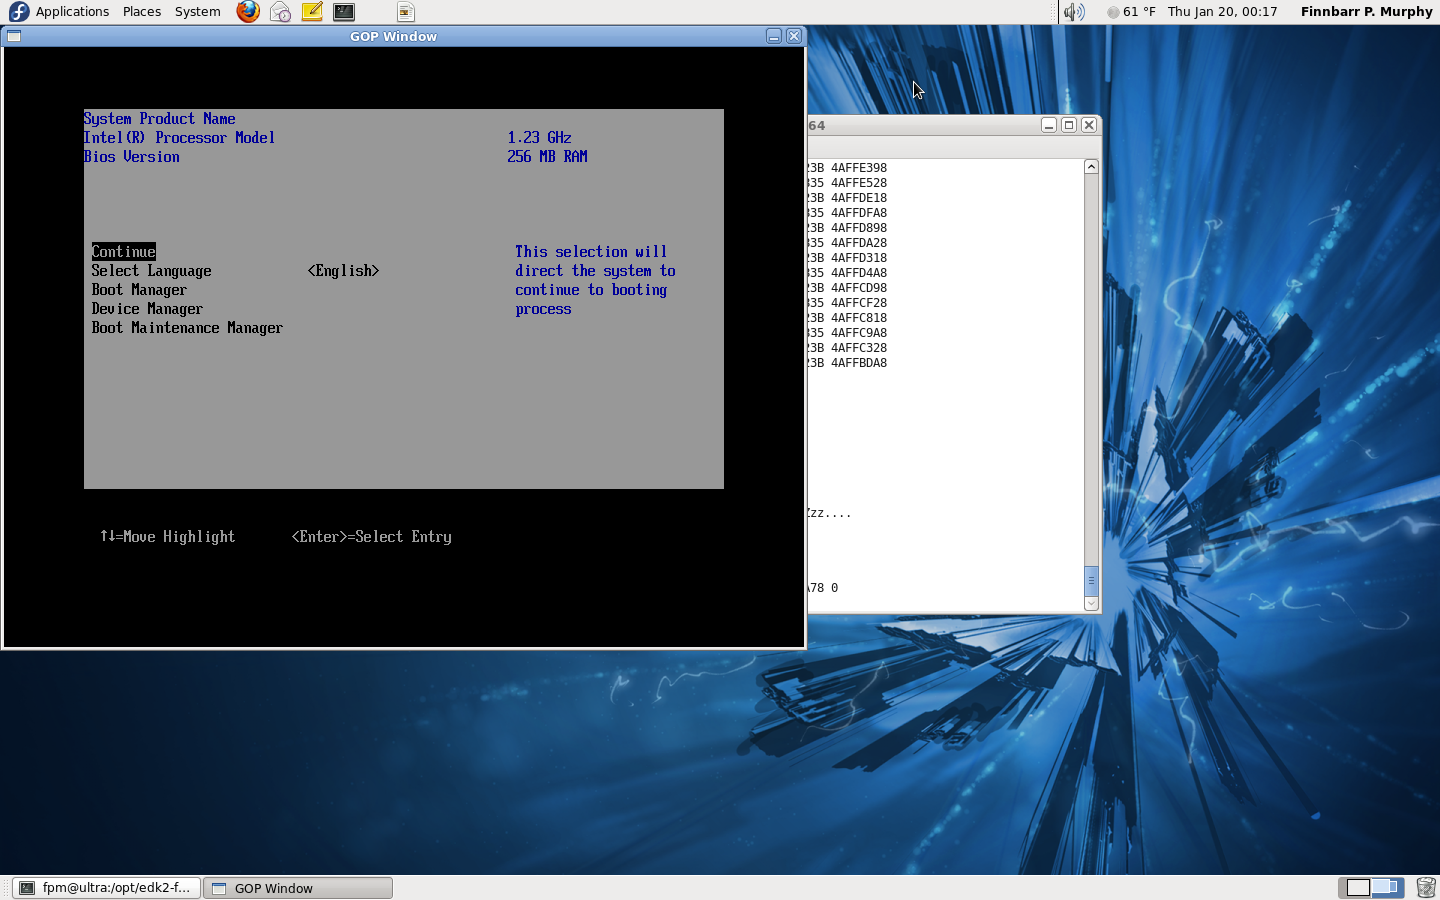
I do not have the time or the space in this blog to detail the boot manager options so just experiment with it yourself. You cannot damage anything on your system.
If you select the Continue option in the boot manager or simply wait for the progress bar to complete, you will end up at a UEFI shell prompt as shown below>
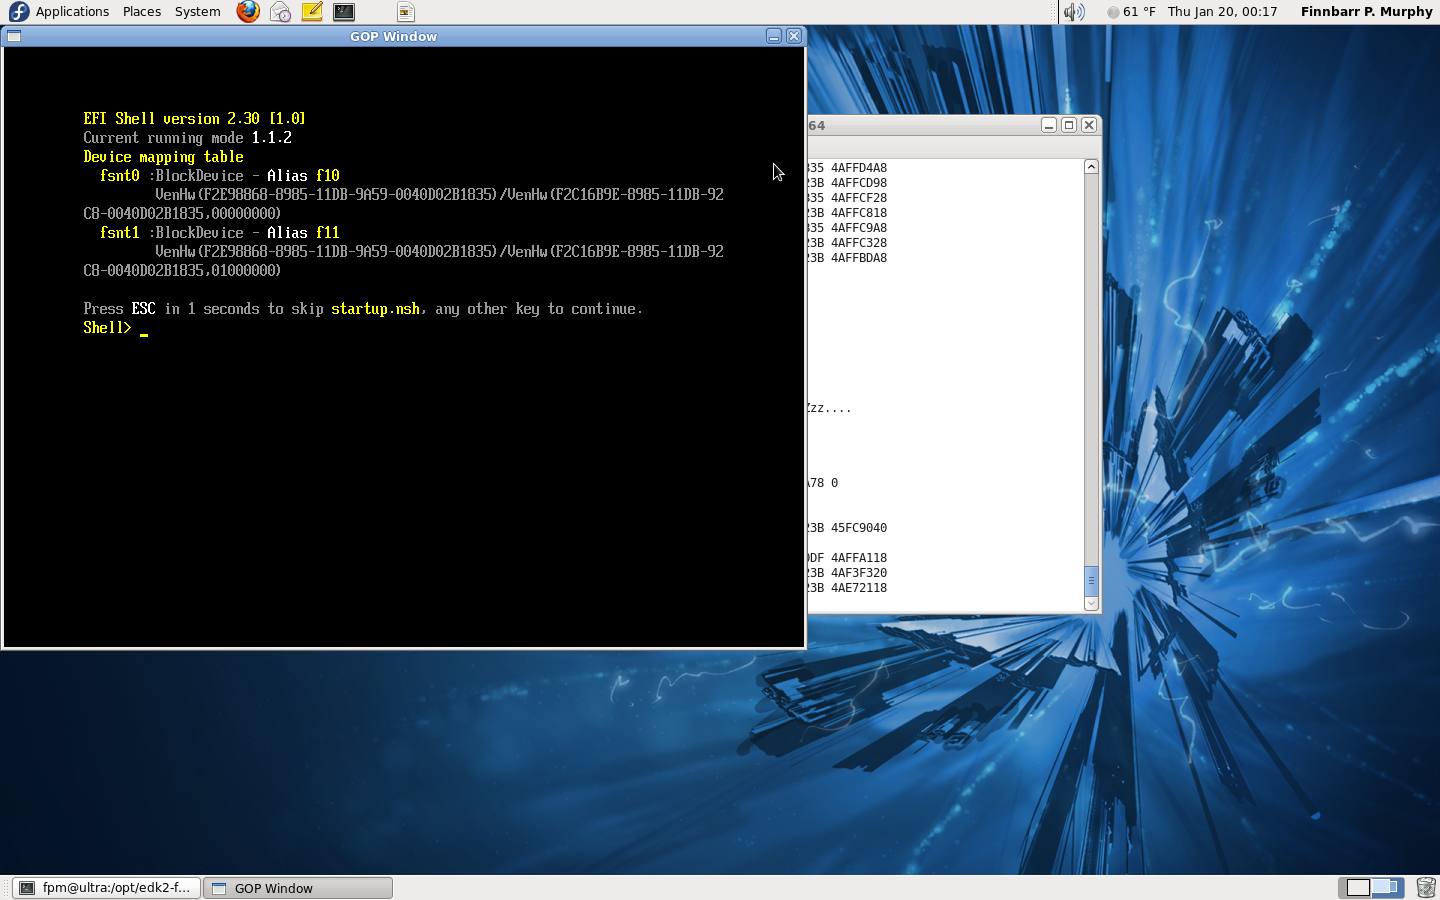
UEFI shell scripts use a file extension of .nsh. If a file called startup.nsh exists, it is invoked whenever the UEFI shell is invoked. Effectively, startup.nsh is equivalent to .kshrc for the Korn shell or .bashrc for the Bash shell.
If you are unfamiliar with the UEFI shell, I suggest you use the help command to list out the available commands. A -b argument can be used with the help command to page the screen output. A good introduction to and overview of the UEFI shell and the various commands can be found here.
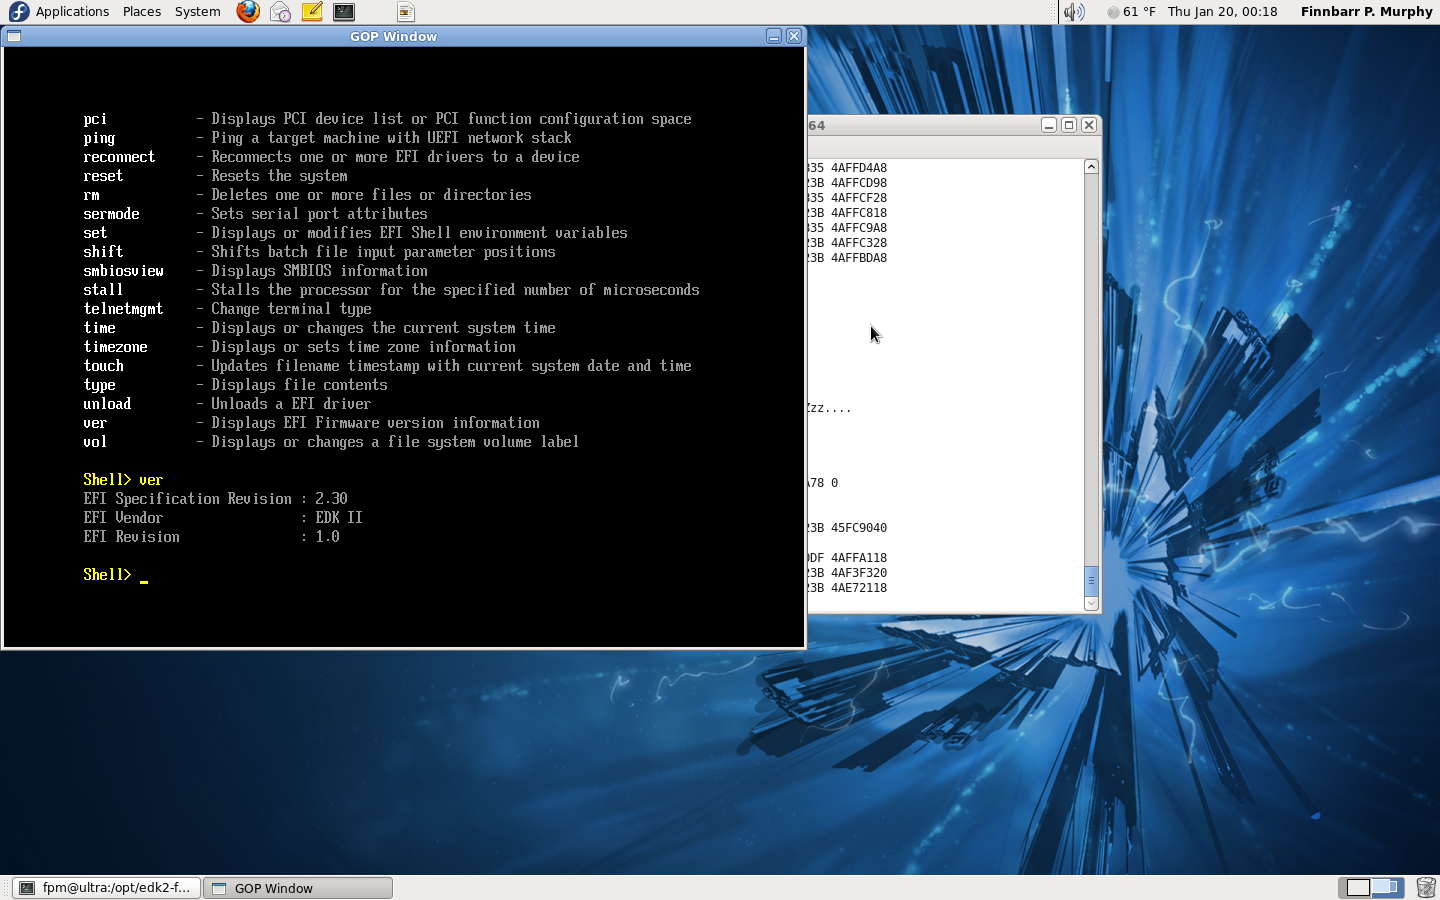
The UEFI shell maps drives in a similar manner to DOS. The map command lists the mappings between user defined names and devices. In the example shown here f13 maps to /boot/efi/. You have to enter f13 at the Shell> prompt to actually access files on a device. You cannot access a filesystem directly from the shell prompt. Once you have done that, you can list directory contents, edit files, etc. as in a regular shell. Backslashes, as in DOS, are used by default instead of forward slashes but either can be used in the UEFI emulator.
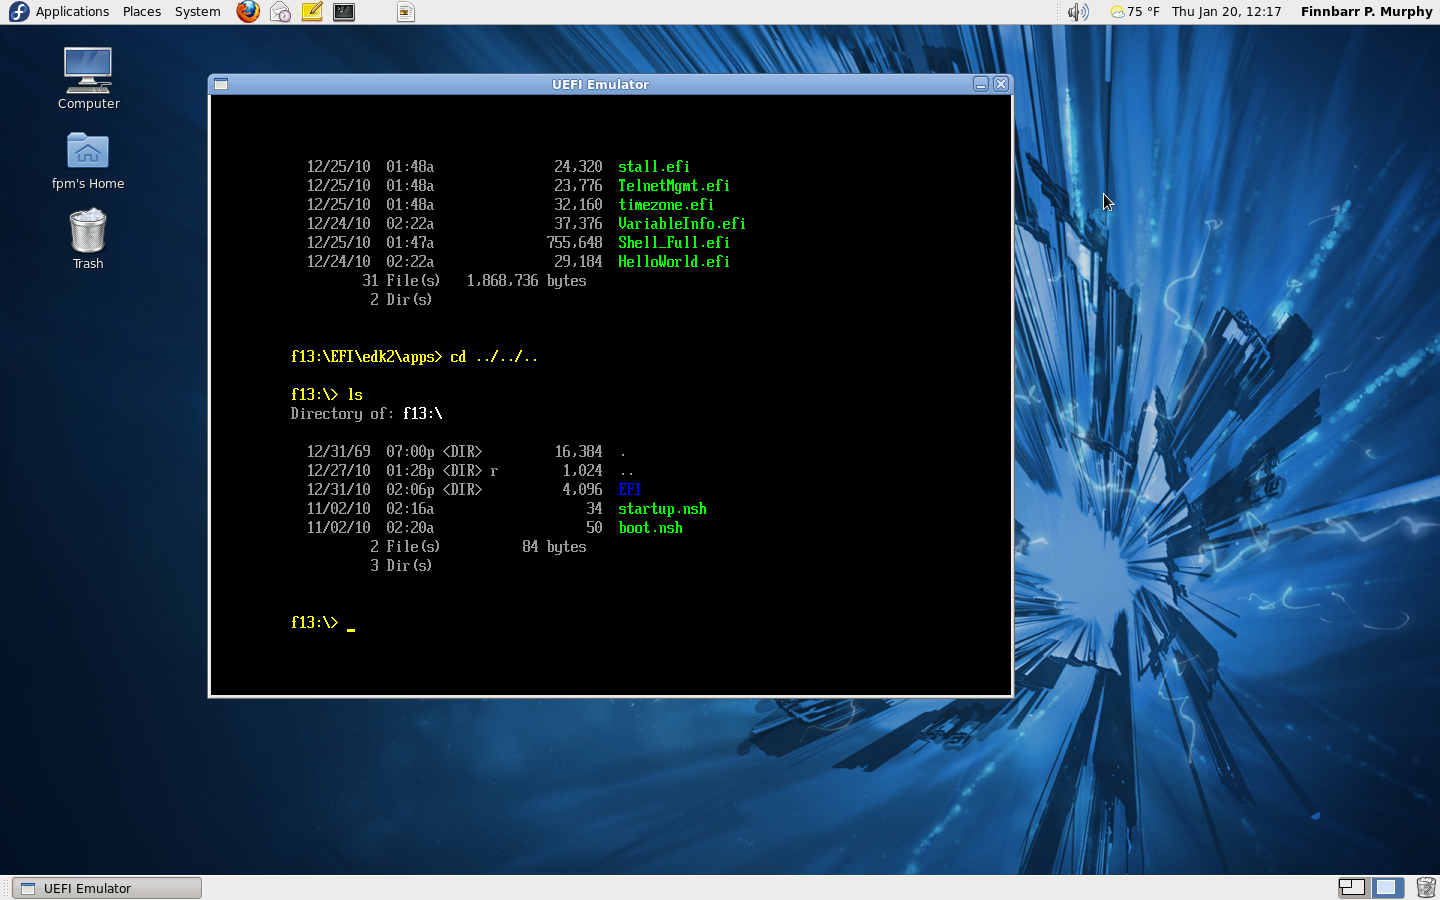
To exit the UEFI emulator, type reset at the shell prompt. If, instead, you type exit you will end up back in the boot manager.
If you want to obtain a source or binary RPM of the UEFI emulator, you can download either from here. I built both of these RPMs for 64-bit Fedora 14. They do not include the full EDK11 source – only the sources necessary to build the emulator on GNU/Linux.
If I get the time I will describe in a future post how to modify the SNP driver (see UnixSnp.c) for use on GNU/Linux. With this modification you can get networking utilities working on the UEFI emulator.
Meanwhile, if you do want to compile in the network modules, comment out the appropriate sections in ../UnixSnpDxe/UnixSnp.c, uncomment the previously commented networking directives in UnixPkgX64.dsc and UnixPkgX64.fdf and change the network card to the correct device in UnixPkgX64.dsc On Fedora 14, this is typically eth0.
gEfiUnixPkgTokenSpaceGuid.PcdUnixNetworkInterface|L"eth0"
If you are reading this post at some time in the future and are using a Dell or HP system, note that ethX may no longer be the device name for your ethernet adaptor(s). The Fedora 15 Consistent Network Device Naming project intends to change the network device naming scheme from ethX, a naming scheme which is nearly as old as GNU/Linux, to a physical location-based name for easy identification and use.
As always, experimentation is the best form of learning.

Hi Friend,
Myself Prabhu from India. Currently i am working on UEFI driver development. I am pretty new to this and don’t know much about hardware.
My assignment is to develop UEFI service driver for my client. I have developed service driver with the help of Intel EFI supported motherboard.
The service driver working fine as expected. But the problem arise when I try to implement same service driver with the DELL and IBM server.
Here is server detail:
1. IBM server x3650 M2 with UEFI 2.0 support
2. Dell server poweredge R710 with UEFI 2.1 support
3. Intel server with EFI 1.10 support.
I have a USB stick with UEFI shell support. I have created UEFI boot up disk with the help of UDK(UEFI development kit). This USB stick is working fine
and able to boot in Intel server (EFI 1.10 version supported motherboard). But when i try to boot the same USB in DELL server (UEFI 2.1 and IBM server(2.0)
system hanging(i.e. not booting up. Showing booting screen long time). I could not figure out why this happening . Any help from you would be helpful to fix
this problem.
Thanks in advance,
Prabhu